Replacing the front and rear bumper is a common entry-level project for car modification enthusiasts.
The following are the tools and preparations required to install the front and rear bumpers, installation steps and precautions.
Tools & Preparation Required to Replace The Bumper
a. Tools for Replacing Bumper
Replacing a bumper can become quite challenging without the right tools and techniques.
- Gloves protect hands from sharp edges and prevent injuries.
- Flashlight helps work in low-light conditions.
- Measuring tools ensure accurate installation positioning.
- Socket wrench set is used to remove factory bolts and secure the new bumper.
- Ratchet wrench facilitates quick bolt removal.
- Open-end wrench can be used to tighten bolts in tight spaces.
- Phillips and flat-head screwdrivers are used to remove small parts and clips from the bumper.
- Plastic Shims help adjust bumper height when necessary.
b. Vehicle Preparation
Before installation, park the vehicle on a flat, secure surface, engage the parking brake, turn on the hazard lights, and place a warning triangle to prevent collisions with other vehicles.
*If possible, using a lift will make the process more convenient.
*Cover other parts of the vehicle, especially painted surfaces, with a cloth or cardboard to avoid unnecessary scratches during the replacement process. This not only helps preserve the vehicle’s condition but also ensures a smoother installation.

c. Bumper Inspection
Carefully inspect the new bumper for any defects, deformations, or other issues. Also, ensure that all necessary components, such as clips and screws, are included to avoid missing parts during installation.
Removal and Installation of Car Bumper
*It is recommended to use your mobile phone to record the process of replacing the bumper for reference when reinstalling.
A. Steps for Replacing & Installing the Front Bumper
a. Replacing the Existing Bumper
- Open the hood and locate the bumper’s mounting screws and clips, which are usually hidden along the edges, bottom, and inside of the bumper.
- Use the appropriate tools, such as screwdrivers and plastic trim removal tools, to carefully release the clips and unscrew the bolts.
- Pay attention to any electrical connections, such as fog lights or headlights. If necessary, disconnect them first to prevent wiring damage while removing the bumper.
*Be gentle during the process to avoid damaging the car body or existing components.
b. Installing the New Front Bumper
1. Positioning the Bumper:
Align the new front bumper with the mounting points on the vehicle and gently place it in position, ensuring a proper fit against the car body.
2. Securing the Bumper:
Use screws to loosely fasten the bumper to the vehicle. Avoid overtightening or leaving them too loose at this stage.
When tightening the screws, follow a diagonal pattern to distribute the pressure evenly, ensuring a balanced and secure installation.
3. Connecting Wiring and Components:
Connect the bumper’s wiring harness to the vehicle’s electrical system, making sure all plugs are firmly connected to prevent loose connections or poor contact.
Next, install additional components such as the grille and air intake according to their designated positions, then securely fasten them with screws.
4. Adjustments and Final Inspection:
After installation, adjust the bumper’s position to ensure even gaps and smooth alignment with the vehicle body.
Check the bumper’s stability by gently shaking it to detect any looseness or unusual noises.
*If any issues are found, make the necessary adjustments and tighten the fittings as needed.
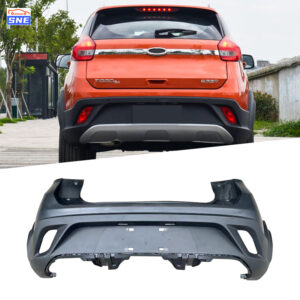
B. Rear Bumper Installation Steps
a. Replace Rear Bumper:
Removing the Taillights and Related Components
- Open the trunk and locate the screws securing the taillights. After unscrewing them, carefully remove the taillights from the vehicle and disconnect the wiring harness.
- Identify the mounting screws and clips holding the rear bumper in place. These are usually located at the bottom, sides, and inner sections of the vehicle.
- Use the appropriate tools to unscrew and release the clips, then gently detach the rear bumper from the car body.
b. Install The New Rear Bumper
1. Positioning the Bumper
Align the new rear bumper with the mounting points and gently push it into place from the back of the vehicle, ensuring a snug fit against the car body.
2. Securing the Bumper
Use screws to fasten the bumper to the vehicle, paying attention to the tightening sequence and torque to ensure a secure installation. Having an assistant can help position the bumper accurately.
3.Connecting Wiring and Components
- Connect the rear bumper’s wiring harness to the vehicle’s electrical system, ensuring all connections are firm and secure.
- Reinstall the taillights in their original positions and tighten the screws.
- Check additional components such as parking sensors and reflectors to ensure proper installation and functionality.
4.Final Touches and Inspection:
After installing the new bumper, take time to check and refine the details.
- Clean up any dust or debris from the installation process.
- Ensure all components are properly secured and that the bumper is stable with no looseness.
- Remove protective covers from the car body and inspect the paint for any scratches or damage.
- Make minor adjustments if necessary to achieve the best fit and alignment.
Once everything is set, start the vehicle and test all functions, including lights, sensors, and any other integrated features.
Finally, do a full exterior check to confirm the bumper seamlessly blends with the car body.
FAQ
Q1: What should I do if the screws cannot be tightened when installing the bumper?
A1:First, check if the screws match the mounting holes. If they don’t, replace them with the correct ones.
If the screws are correct but not securing properly, try applying more force when tightening.
However, be cautious not to overtighten, as this could strip the threads or damage the vehicle’s components.
Q2: What should I do if the gap between the bumper and the car body is uneven?
A2:You can adjust the bumper’s position to resolve this. Gently pry the bumper to move it into place until the gaps are even.
If the gaps are too wide or too narrow, check if the bumper is properly aligned or if any components are missing or not fully installed.
Make sure everything is in the correct position to achieve a seamless fit.
Q3: What should I do if the reversing radar does not work after replacing the rear bumper?
A3:First, check if the backup sensor wiring is securely connected. If it’s loose, simply reconnect it.
If the wiring appears fine but the sensor is still not working, the backup sensor may have been damaged during the disassembly or installation process. In that case, further inspection and repairs to the backup sensor system may be necessary.
Q4: What should I do if the buckle of the front bumper is damaged?
A4:If the clips are only slightly damaged, you can attempt to repair them using glue or other bonding methods.
However, if the damage is severe and the clips cannot be repaired, it is necessary to replace them with new ones to ensure the front bumper is securely installed.
Q5: What safety precautions should be taken when replacing the bumper?
A5:When installing the bumper, make sure the vehicle is parked securely, engage the parking brake, turn on the hazard lights, and place a warning triangle to prevent other vehicles from colliding. Additionally, wear protective gear such as gloves and safety goggles to avoid injuries during the process.
Q6: How to choose a bumper suitable for your vehicle?
A6:First, choose a bumper that is compatible with the vehicle’s brand, model, and year.
Next, consider factors such as the material, quality, and appearance of the bumper. Opt for a reliable, aesthetically pleasing bumper that complements the overall style of the vehicle.
Additionally, you can refer to reviews and experiences from other car owners to select a product with a good reputation.
Q7: Is it necessary to paint the bumper after installing it?
A7:If the newly installed bumper is a different color from the car body or has scratches, blemishes, or other issues, it may need to be repainted to match the car’s color and improve its appearance. When repainting, it’s best to choose a professional auto body shop and follow the correct painting process to ensure a smooth, high-quality finish.
Q8: Does the bumper have any impact on the performance of the vehicle after installation?
A8:Under normal circumstances, a properly installed bumper should not have a significant impact on the vehicle’s performance. However, if the bumper is installed incorrectly, it could affect the vehicle’s aerodynamic performance, leading to increased drag and higher fuel consumption while driving. Therefore, it is essential to ensure the bumper is accurately positioned and fits well with the car body during installation.
Q9: What is the function of the reflector on the rear bumper?
A9:The reflective strip on the rear bumper is primarily designed to improve the vehicle’s visibility in low-light conditions or at night, helping to alert vehicles behind to maintain a safe distance and avoid rear-end collisions. Therefore, when installing the rear bumper, it is crucial to ensure that the reflective strip is correctly positioned, unobstructed, and clean to maintain its reflective effectiveness.
Q10: Can I install the bumper myself?
A10:If you have some knowledge and skills in car repair and the necessary tools and equipment, you can install the bumper yourself. However, since bumper installation requires a certain level of technical expertise and experience, if you’re unsure about being able to complete the installation independently, it’s advisable to visit a professional auto repair shop or modification shop to ensure quality and safety during the installation.