Buckle up, gearheads! Let’s dive into the wild world of car fender flares—a must-know topic for anyone who’s ever dreamed of turning their ride into a beastly masterpiece. Whether you’re dodging rocks on a backwoods trail or just want your car to flex some serious attitude, fender flares are your ticket to glory. So, what’s the deal with these bad boys? Why should you care? And how do you pick the perfect set? Stick with me—this guide’s got all the juicy details you’ll need to roll out in style.
What Are Fender Flares on A Car or Truck?
Definition and Purpose
Fender Flare is a semicircular component protruding from the fender above a car’s tire. Most people refer to it as the “eyebrow” of the wheel, hence the name “wheel arch.”
Its primary purpose is decorative, catering to the driver’s personalized needs, while also widening the vehicle’s body for a sleeker, more curved appearance. From an aerodynamic perspective, the wheel arch aligns with fluid dynamics, helping to reduce the drag coefficient. Installing wheel arches on a car can give it a more striking look and improve its cornering limits.
A Brief History of Fender Flares
Picture this: it’s the 1970s, and off-road enthusiasts are tearing up trails in jacked-up Jeeps and trucks. Mud’s flying, rocks are pinging off metal, and someone brilliant says, “Hey, what if we widen the fenders?” Boom—fender flares were born. Back then, they were all about function, hacked together from whatever worked. Fast forward to today, and they’ve evolved into a full-on automotive fashion trend. From rally cars to street cruisers, these flares have a story—and it’s a gritty one.
What Do The Fender Flares Do?
Fender Flares Slow Down Rusting
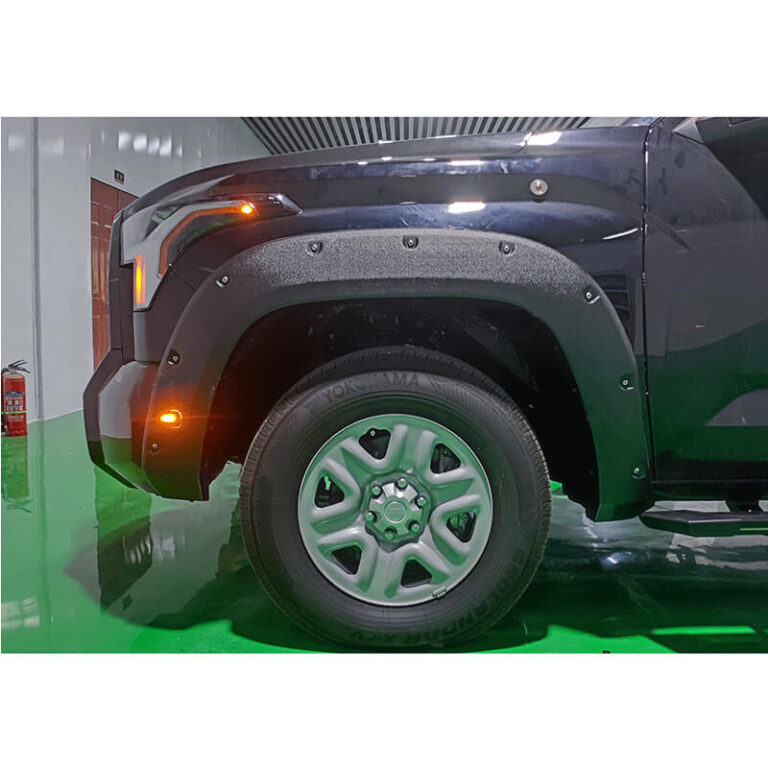
Many pickup trucks are equipped with wheel arches for practical reasons. wheel arches provide protection to the vehicle’s body, particularly the fenders and side panels, by shielding them from debris, rocks, and mud kicked up by the tires—something pickup trucks often encounter due to their frequent use on rough or off-road terrain.
After installing fender flares, they protrude about 5 cm beyond the vehicle body, effectively reducing mud splashing onto the sides and keeping the car looking sharp. They also prevent flying pebbles from scratching the undercarriage and paint surface. Additionally, they stop mud from splashing onto tie rods and ball joints, helping to prevent premature rusting.
Protecting the Car Paint
Many people have experienced accidentally scraping the wheel arch area in tight spaces. Once a scrape occurs, methods such as sanding or using a touch-up paint pen won’t restore it, leaving repainting or bodywork as the only options for repair.
However, with SUV models—80% of which come equipped with wheel arch trim panels—the damage is often less severe. In some cases, you can even replace the trim yourself, providing maximum protection to the door and side panel paint.
Therefore, Fender flares will not damage the paint.
Those little extensions act like a force field, catching dirt, rocks, and road salt before they can ding your precious paint job. If you’re an off-road junkie or just live where winter turns roads into a salt mine, flares are your first line of defense. Who doesn’t want to keep their ride looking pristine?
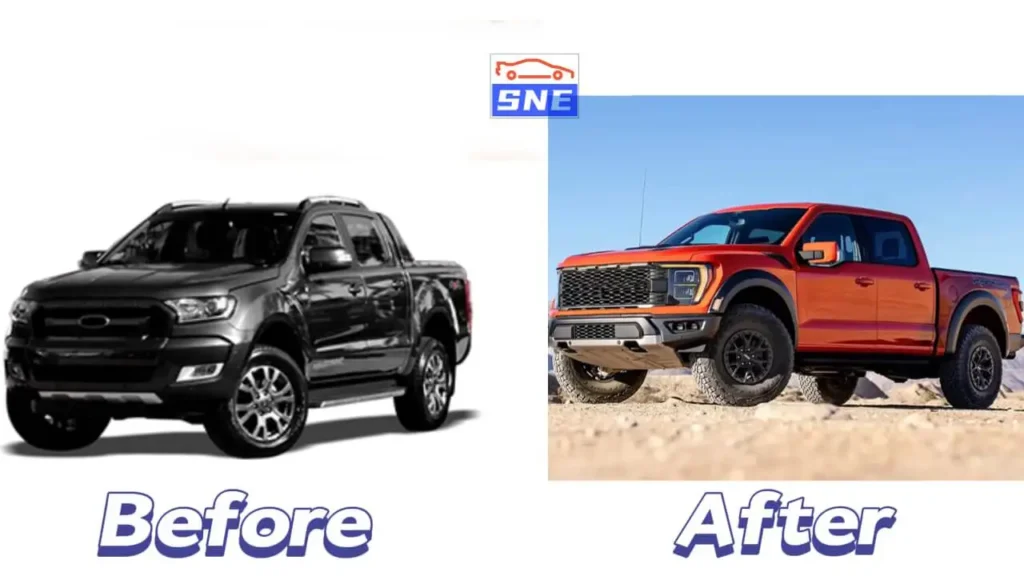
Fender Flares Enhance Aesthetics
Want your ride to turn heads? Fender flares are like the cherry on top of your automotive sundae. They give your car that aggressive, wide-stance vibe—like it’s ready to pounce. Whether you’re rolling a lifted truck or a sleek tuner, flares add that extra oomph. They scream, “I’m not here to mess around,” and trust me, people notice.
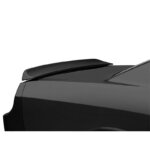
Especially with dark grey Fender Flares, the vehicle’s body texture is instantly elevated after installation, making the car appear vibrant and significantly more rugged.
Before installation: At first glance, it looks ordinary, without obvious golden section line, thin body, lack of off-road elements
After installation: A black golden section line is added, which instantly improves the grade of the car, making it dynamic and fashionable
Types of Car Fender Flares
OEM Fender Flares
-
What Are OEM Fender Flares?
OEM fender flares—sounds fancy, right? Let’s break it down. “OEM” stands for Original Equipment Manufacturer, which is just a fancy way of saying these fender flares come straight from the same folks who built your car.
So, what are they exactly? OEM fender flares are those wheel well extensions designed and produced by the car manufacturer (like Toyota, Ford, or Jeep) to fit your specific make and model perfectly. They’re all about keeping things seamless—matching your car’s curves, color, and vibe like they were meant to be there all along. No guesswork, no awkward gaps—just a clean, factory-fresh look.
-
Why Go OEM?
For one, they’re built to the brand’s standards, so quality’s usually top-notch. They’re practical too—offering just enough coverage to protect your paint from road debris without screaming for attention. Reliable, straightforward, and great if you’re not chasing anything wild. But if you’re itching for a bolder stance or extra flair, you might find them a bit tame compared to aftermarket options.
Aftermarket Fender Flares
Ready to spice things up? Aftermarket flares are where the real fun begins. These are the rebels of the bunch, designed by third-party wizards to take your car from “meh” to “whoa.” They come in all shapes and sizes, offering more coverage, bolder looks, and a chance to stand out. Buckle up—this is where the wild ride starts.
How Remove and Install Fender Flares?
For models without fender flares, the body manufacturing process can connect the side panels and the body through vertical welding or hemming techniques. Given the rapid pace of model updates today, body welding combined and adhesive fender flare attachment might be the best approach.
For models with fender flares, the process can be divided into two categories: the fender flare trim is connected to the body using clips, or the fender flare with 3M tape is adhered to the vehicle body.
Considering the difficulty of installation and the final effect, the most recommended methods are:
For models without fender flares: Use adhesive fender flare attachment.
For models with fender flares: Utilize the original vehicle clips for installation, along with adhesive attachment.
Below, we’ll provide a detailed explanation of fender flare installation methods: DIY Installation Tips-install fender flares without drilling.
Models Without Fender Flares
Soft Rubber Strip Fender Flare Installation Method:
1.Clean the outer edge of the metal protrusion above the wheel thoroughly, wipe it dry, and ensure there’s no oil or moisture.
2.Remove the release paper from the adhesive tape on the back of the flare, attach one end of the flare to an appropriate position on the outer edge of the wheel protrusion, and then bend it along the curve of the protrusion. Align it properly and guide the entire flare onto the vehicle body.
3.Since vehicle sizes vary, trim any excess flare with a blade or scissors, then press the flare firmly to ensure full contact and adhesion.
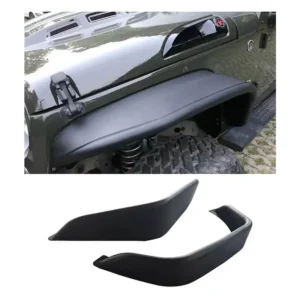
Models With Fender Flares
Fender Flares Removal and Installation -Taking TANK 300 As an Example
Removing Original Fender Flares:
1.Knock off the push-in clips on the underside of the fender flare.
2.Use a pry tool to loosen the original fender flare and remove it.
3.Unscrew the 8 screws inside the front fender flare frame.
4.Unscrew the inner screws of the rear fender flare, use a pry tool to assist, remove the original rear flare, and take off the clips.
5.Remove the push-in clips from the rear fender flare, pry off the original rear flare, and remove the clips.
6.Attach clips to the new fender flare first.
7.Clean the installation area thoroughly, ensuring no dust remains.
Soft Rubber Strip Fender Flare Installation Method:
At the 3M adhesive attachment points, apply adhesion promoter, peel off the 3M tape backing, align it with the clip positions, and secure it in place. Pay attention to aligning the side clip positions correctly. Use the same method to attach the rear fender flare.
Original Clip Installation Method:
For wide-body fender flares, the factory leaves original clip positions and pre-drilled mounting holes. Simply snap the clips into place for a quick and convenient installation.
Note: Long fender flares are for the fender area, while short ones are for the door area. Be sure to distinguish between left and right, as well as front and rear fender flares, before installation.
Paint the Fender Flares
From matte black to chrome accents, the customization game is strong with fender flares. You can go subtle with a factory-matching finish or wild with neon pops. Some folks even paint them to match their wildest dreams—think camo for the hunters or glossy red for the speed demons. It’s your car, your rules. How cool is that?
The owner of this Wrangler opted for a custom paint job on the fender flares. The black paint paired with the blue body creates a bold, stylish look that’s both sophisticated and rugged, perfectly capturing the spirit of off-road adventure. The matte black finish is smooth and refined, almost like frosted plastic, blending seamlessly with the vehicle’s aesthetic. It acts like an impenetrable shield, offering hardcore protection for those wild off-road journeys.

How to Choose the Right Fender Flares?
Compatibility with Your Vehicle-are Fender Flares Universal?
Not all flares fit all rides—here’s how to avoid a mismatch nightmare. First, check your car’s make, model, and year. Some flares are universal, but most are tailored to specific vehicles. Measure your wheel wells and tire size too—oversized rubber needs wider flares. Don’t get stuck with a set that’s all wrong for your baby.
Style vs. Functionality
Are you all about looks or all about grit? Let’s break it down. If you’re hitting trails, go for wider, tougher flares that can take a beating. Just cruising the streets? Sleeker, painted flares might be your vibe. It’s like picking between a tank and a sports car—both are awesome, but it depends on your battlefield.
Plastic and ABS vs. Fiberglass
Lightweight and affordable, plastic flares are the unsung heroes of the game. Most are made from ABS—a tough, flexible plastic that laughs in the face of cracks and dents. They’re easy on the wallet and come in tons of finishes. Want something that’ll last without breaking the bank? ABS has your back.
Fiberglass’s lighter than steel, stronger than basic plastic, and molds into sleek, custom shapes. The catch? It’s pricier and can crack under heavy abuse. If you’re chasing that high-end look and don’t mind the cost, fiberglass is your VIP ticket.
why some fenders are susceptible to damage and break quickly?
When choosing fender flares for an vehicle, make sure the material isn’t too hard. Overly rigid materials become especially brittle in winter, and since fender flares are bound to get bumped while driving, they can easily crack upon impact. This makes them prone to damage and quick to break.
Saili Manufactures OEM Fender Flares & Aftermarket Fenders
Enhances off-road dominance while protecting the vehicle body.
Manufactured using precise original vehicle data for a perfect match with the original car. Accurate width and consistent curvature.
Designed to fit seamlessly with the original mounting points, offering a zero-gap, non-destructive installation—great products stem from outstanding attention to detail.
Precisely crafted wheel arch curves ensure a 100% fit.
Maintenance and Care
Cleaning Tips
Keep your flares looking fresh with these pro tips. Hit them with soapy water and a soft brush—nothing fancy. Avoid harsh chemicals; they’ll dull the finish faster than you can say “wax on.” For stubborn grime, a microfiber cloth works wonders. Rinse, dry, and boom—your ride’s ready to shine. How easy is that?